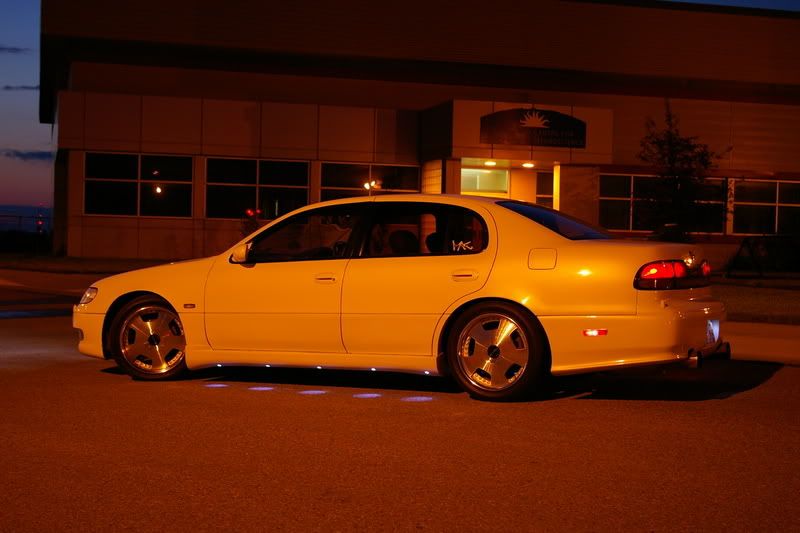
| 1990 300ZX TT...my baby
Edit: Red and i clean her alot but detail whenever i fell like it. one tip: use zaino products or follow this post i got from 300ZX club:
"I got this from my friend who found it from a prelude forum. Some of these practices seem alot, buts its done a lot for me. it also has a lot of good products that i have tried even though some are a good bit of $.
Costco or other warehouse store (Simple Green, and cheap bulk towels for NON-PAINTED SURFACES ONLY!
If the product name doesn’t have Griot’s Garage in front of it, it will be found on one of the other two websites. Otherwise, I will tell you where to purchase it.
I am well aware of Zaino products. I feel that my techniques produce nearly identical results with less effort. Zaino products are excellent, however, and I cannot advise against them.
This guide is produced as a favor to my fellow auto enthusiasts, and is actually a revision of a guide I produced two years ago. Please don’t post this guide on other websites without at least giving me credit for it, as I spent considerable time creating it and it reflects the knowledge I have gained in a decade of detailing cars. People have told me that they print out my detailing guides and keep them for reference – if my methods work for you, I certainly encourage you to keep a copy.
I can only give you instructions. 99% of the job is YOU. Nothing makes your car look better than experience, and technique is just a little different from car to car. I guarantee that your tenth detailing job will be noticeably faster, better looking, and easier than your first.
This is a free guide, and I do NOT accept responsibility for mistakes YOU make. I give you safe techniques and safe products to use, techniques that are gentle enough to use for the life of your car…but if it’s not my hands doing the job, it’s not my responsibility.
Let’s get started.
I. Washing the Car, the Most Important Step
Before we even talk about washing the car, you need to know WHERE to wash it. In the shade, or early morning/late afternoon. The paint must be cool, the brakes must be cool. If you can pull the car into a garage to dry and detail it, that would be excellent. Otherwise, do ALL your car care in a cool and shaded area. During hot South Texas summers, I wait until 5PM to wash or start at 8AM if I need all day to detail. Trust me, forming hundreds of water spots before you even have time to dry the car is NOT fun.
Washing your car is quick, easy, and you do it all the time. So why is it so important? Well, washing the car maintains the paint in between detailing jobs, and protects the paint as well. How? Dirt and other contaminants on your paint only need some form of friction to drag across the clearcoat, and potentially cause thousands of minor scratches over the life of your car. Frequent washing helps prevent this, obviously by keeping your paint clean. Even dragging a finger over dirty paint could be enough to cause clearcoat scratches. Improper washing can also cause scratches and swirls, whereas proper technique will keep your car looking its best. Let’s go over proper technique.
NOTE HOSE ATTACHMENTS – for the rest of this guide, I assume you are using a hose with an adjustable nozzle. You’ll at least need to be able to do a concentrated “jet” setting, and a soft “shower” setting. I prefer a metal one coated in rubber, in the remote chance you hit the paint the rubber will protect it. Plastic doesn’t last long. Griot’s sells a crazy anodized one for around 60 bucks…total waste of money. Just go to your local Pep Boys or other auto parts store.
The first step should be the wheels, tires, and wheelwells. Because you’re using a cleaner stronger than car soap, you need to do these areas first so that any overspray/splashing of the cleaner will land on dirty paint, where you can quickly rinse it off. I have found a solution of Simple Green and water (6 ounces per bucket of water) works great for these areas. Wheel cleaners have harsh chemicals, and cost much more than Simple Green (8 bucks a gallon at Costco!. Even the filthiest wheels don’t need a stronger solution, just elbow grease. Don’t bother using your Simple Green full strength…one of the basic rules of car care is “Never use more than you need, or there will be trouble”. Anyway, get a small USA-made cotton towel and a long-handled soft bristle brush (Griot’s Garage has nice brushes for about 6-7 bucks, cheap white Costco towels are perfect for non-painted surfaces). First, rinse the wheels/tires/wheelwells with your hose on the “jet” setting. Scrub the wheel and tire with the brush, dunking the brush in the bucket frequently. Dunk the rag in the bucket, and use that to get the small areas of the wheel. With the rag, you can reach back and get further into the wheel usually. Use the brush to scrub the wheelwells, if you have enough gap (it’s easier). If not, just use the towel and get your hand in there as best you can. This small step, done at every wash, keeps wheelwells looking new forever. Most people never clean them…just a small step that some people overlook. About once a month, use Griot’s Garage Rubber Cleaner on the tires. Spray, let sit for one minute, scrub with the brush, rinse. Otherwise, Simple Green works great. Use the leftover Simple Green and water to scrub your exhaust, if you’d like. I use the brush to scrub the mufflers and piping (as far back as I can reach anyway), then the rag for the exhaust tip and any area close enough to the paint that the brush might scratch it.
IF YOUR ENGINE BAY IS DIRTY ENOUGH TO NEED MORE THAN JUST A RAG AND WATER
Clean it at this point. Again, the same Simple Green solution works great. Make a fresh bucket though, as the first one should be pretty dirty by now. You can use the same rag from the previous step, just rinse it out first. Wring it out a little, but not too dry. Scrub, then wipe with a rag soaked in water ONLY. That way, you won’t leave cleaners on your plastic parts and rubber hoses. Dry with a third rag. I’ve tried hosing the engine bay with the hose on very low pressure, and covering the electronics. This is risky, and not necessary. I have blown a couple spark plugs this way, even when I was being careful. I just use the rags now…take a little longer, but just as effective. If you’re not using cleaners that might get on your paint (just need to clean minor dirt and dust with a wet rag), just wait until after the car is washed. You’ll need to open the engine bay to dry the car anyway, just do it then.
IF YOUR ENGINE BAY JUST NEEDS A WIPEDOWN WITH A WET RAG
You’ll do the engine bay later. Rinse out your Simple Green bucket, the rag, and the brush. Get out a separate bucket that you use for car wash soap ONLY, a 100% cotton towel (high quality USA, the Costco ones are NOT good enough for your paint, I use a Griot’s Garage Cotton “wax” towel, their cotton “wash” towel is too small and takes too long), and your car wash soap. I really like Meguiar’s #62 Car Wash and Conditioner but any decent soap will be fine. I’ve used the cheap Zymol stuff, the Turtle Wax Gold Class, and other cheap soaps. Honestly, the difference is minor. They all clean equally well, and they all whisk away dirt without scratching the paint (if you use a cotton towel and use enough soap in your bucket). The only difference is that the cheap ones will strip your wax a little faster, but I detail often enough that this isn’t a concern. I wash my car once a week, buy soap by the gallon, and paying $22 a gallon for the Meguiar’s gets old. It’s the best, though, if you need to have the best. Smells great too!
Another faster and easier (but more expensive) washing option is the Griot’s Garage Boar’s Hair Brush. I think it’s over 60 bucks, but mine is 9 years old and still going strong. In my experience, it does not scratch the clearcoat, is easier to rinse than a towel, and makes soaping the car faster. It’ll hold lots of soapy water in it, and shakes the dirt out easily when dunked in the bucket. I use a cotton towel 90% of the time, just because it’s always the safest option…but that Boar’s Hair Brush is very nice.
Fill the bucket ¼ way with water (I use the yellow Griot’s Garage Ultimate Wash Bucket, which is huge and has a shelf in it, but that’s for super-geeks only!, add just a bit more than the recommended amount of soap (read the label, then add a bit more to ensure adequate lubricity on the paint), fill to the top with water. Put the rag in there, and set your nozzle on “jet”. Rinse the car, top to bottom, be very very thorough. The more dirt you get off the car without actually touching the car, the lower your chances of scratching the paint will be. I rinse every panel, nook, and cranny at least twice. When you soap, follow these three rules –
1. Soap from top to bottom, so the soap from the top will drip down onto the dirtier bottom parts
2. Soap from section to section, and rinse as you go. Never let soap dry on the paint.
3. Side to side motion, NEVER circular. Swirl motions make swirl marks. Whether it’s washing, waxing, polishing, clay bar, whatever… ALWAYS side to side motion.
Like I said, rinse section by section. If the car is really filthy, I’ll do one side then refill the bucket, rinse out my towel, and then do the other side. Dunk your towel frequently and shake it inside the bucket. I dunk my towel once per section (door, hood, trunk, roof, quarter panel, etc.). When you’re done, rinse the whole car one more time. Be sure to blast out the panel gaps. Be sure the wheels are rinsed…you can do the wheels again with car soap, but you shouldn’t need to.
Now, it’s time to dry the car. Wash out your bucket and towel, and if at all possible pull the car into the garage to dry. A really great way to dry is with an electric leaf blower…that’s right, a leaf blower. The air will whisk away the water if the surface is smooth (recently polished and waxed), no towel means less friction, and you get the water out of all the little gaps and cracks. Be sure to open the gas door, and blow the water out. Get the side mirrors, too. I don’t remember what the blowers cost, but it’s not bad. Next, I’ll use a large cotton towel and some Griot’s Garage Speed Shine (used to be called Fast Shine, and it’s now green instead of pink) to get any water spots. If you’re going to detail the car, don’t bother. The polish will take care of any water spots. Dry inside the doors, trunk, and under the hood.
If you don’t have a leaf blower, dry with 100% USA cotton towels. Not a chamois, not a Water Blade, not an Absorber. Those things have no nap to them, any remaining dirt is just dragged across the paint. I have seen Absorbers put away wet, and get moldy. Do you have one? Go ahead, smell it. You don’t have to see mold, but you’ll smell it. Lots of people use them with no problems, but there is always the added risk over a good cotton towel. Griot’s Garage sells large micro-fiber drying towels. Micro-Fiber is great for buffing off polish and wax, and it’s safe on the paint, so you might try using those dry towels. I haven’t used them though, and feel no need to try them.
If you just need a wet rag to clean the engine bay, do it now. Real simple – wet rag, wring it out, wipe down the engine bay. Rinse out the rag if you need to.
IN BETWEEN WASHES – forget the Car Duster. You’re risking scratches if there’s anything beyond dust and pollen on the car (dirt, road grime, etc.). I just leave the car dirty until the next wash, but if you absolutely must clean in between washes uses the Griot’s Garage Speed Shine and a cotton towel. If you find bird turd on your car, definitely use the Speed Shine to clean that ASAP. Some people keep a small spray bottle of it in the car, along with a towel – in case you get “bombed” while parked at work or the mall. Bird droppings are acidic, and will eat through or stain the clearcoat if left on the paint.
TREE SAP – 3M General Purpose Adhesive Cleaner. Be sure you immediately wash the area with car soap and water after you use the cleaner. Any solvent will take off your wax, so also re-wax that area.
Now, your paint is clean and dry. Your wheels and tires are clean, your engine bay and exhaust are clean. Let’s move on to the interior.
II. Cleaning the Interior
First, vacuum it out. I use a Shop-Vac. I also have a Griot’s Garage small vacuum that works well, but I still prefer the Shop-Vac because the extra power makes this step go quickly. Remove the floormats and clean underneath them, do the mats, then put them back in the car. Do your seats, if they’re fabric. Do the trunk every once in a while, too. Use a soft brush attachment on any plastic or vinyl parts (getting those food crumbs around your shifter, etc). Use a spray-on carpet cleaner to spot clean your carpets and floormats.
If your floormats are rubber backed, you can use this very effective cleaning method – take the mats out. Fill a bucket with water, and a TINY BIT of laundry detergent. Use half the amount you would use for a small load. We’re talking a small, small amount. Too much will leave “dandruff” in your mats. Hose off the mats, use a handheld bristle brush to scrub the mats with the soapy water. Rinse the mats VERY WELL, and let them dry in the sun. Before you put them back in the car, vacuum them to restore their “fluff”. This works incredibly well, and is cheap and easy using stuff you already have around the house/in the garage (as opposed to renting a carpet cleaning machine, as some people do! I do this once every 4-6 months, and when I sold my ’94 Chevrolet Camaro the 4-year old floormats looked brand new. I wouldn’t do this with foam-backed floor mats (I know BMW’s mats are foam-backed).
Before applying any dressings, I would take a damp rag and wipe down the entire interior. Dash, leather, doors, everything. Just to get the dirt off before you use a dressing. If you think your interior is very dirty, take that bucket of water and laundry detergent and use it. Seriously…it works great, and even leaves a nice mild smell. For plastic, rubber, and vinyl use Griot’s Garage Vinyl and Rubber Dressing. It’s by far the finest dressing I have found. Excellent protection, water based, a nice glossy finish, and best of all it’s not greasy. Vinylex works just as well, but it’s very greasy and that’s the reason I stopped using it. Dressings like Armor-All have silicates, and actually dry out vinyl surfaces. This leads to cracking and discoloration over time. Stick to the two I mentioned, just to be safe. You can get Vinylex at some auto parts stores, and it is likely the only “good” interior dressing on the shelf. Vinylex has a bit more shine, but for me having greasy doors, dash, etc. got old.
For leather, the best I have found is Griot’s Garage Leather Care. It cleans and protects, and doesn’t leave a greasy finish. I have also had great success with Lexol leather cleaner and conditioner (two separate products). They’re the same people that make Vinylex. I think that on finer leather (BMW, M/B, other high-end cars) the Griot’s helps keep the leather more supple. On cheaper leather, it really doesn’t matter. The leather in my Chevy Camaro was certainly cheap, and I used Lexol on it from day one. It kept my leather looking perfect. Lexol is a tad greasy, but when the conditioner dries it’s not that bad (not nearly as bad as the Vinylex!. Just follow the directions on the bottle, and use cotton towels (on the interior, you can use the cheap white Costco ones).
I just bought my first car to ever have fabric seats, so I’m just learning how to care for them. Give me a year, and I’ll most likely have tips for fabric seating too! It looks like Eimann Fabrik makes some fabric cleaners, and I have a lot of respect for their other products. Check out properautocare for ordering and info…I may have to get some just in case.
The final step in the interior is the windows. Nothing, and I repeat, NOTHING works even half as well as the Griot’s Garage glass cleaner. This is the only glass cleaner that truly works as advertised. No haze, streaks, nothing. Just perfectly clean windows. Safe for tint, also. You can spray directly on the window and risk overspray on the interior (the alcohol in the window cleaner will remove your interior dressings from their surfaces), or spray a rag and use that followed by a dry rag. Honestly, The Griot’s Glass Cleaner really is that great. I’ve tried other glass cleaners, and always end up ordering the Griot’s stuff. Use it on your rear view mirror and moonroof/sunroof, too. If you have chrome trim with finger smudges, the glass cleaner will clean that up. Aluminum shift knob? Yup, use the glass cleaner. Display on your receiver/head unit? That too.
The small California Car Duster designed for interiors works okay. So do micro-fiber towels and other dusting tools. However, I don’t see the point to purchasing one. Wipe with a damp rag, followed by a dry rag. It’s easy, and you already have the rags at home. This is the best way to clean your interior in between “interior detail jobs” with the dressings. Quality dressings like Vinylex and the Griot’s stuff won’t wipe off that easily. I would wipe with a damp cloth once a week, and use your interior dressings once a month.
Don’t put dressings on door sills, dead pedals, and your clutch/brake/gas pedals. Not only do they create slippery surfaces (dangerous!, but those dressings will somehow find their way onto your carpet and floor mats. Those areas get dirty fast, so just clean with a damp rag once a week.
If you’re going to detail the car, don’t bother with cleaning the exterior glass just yet. The polish and wax will leave a dust that gets them dirty, so the exterior glass will come later. Besides, I have a great glass polish for you to use, and we’re going to get to that later!
III. Cleaning/Polishing Paint, Prepping for Wax
A lot of people refer to detailing as “waxing their car”. People who have little detailing knowledge often think that “detailing” simply means throwing a coat of wax on a freshly washed car. Well, the way your paint looks and feels is determined by your prep work before applying the wax. A good wax is transparent, both in that it goes on clear and that it simply protects/enhances your cleaning job. This is the stage where we create incredible smoothness, and dramatic depth and reflection. This is the stage that you’ll be appreciating later, and the stage that’s going to set you apart from the guys that go to the car wash.
Let’s take a look at your clean car. Take the back of your hand, and move it across the paint. Is the paint fairly smooth, or very rough? Are the flat surfaces (hood, roof, trunk) a lot rougher than the doors? Get yourself a magnifying glass, if possible. Using it, do you see little white specks in the paint? Those are contaminants. I’ve got three levels, or three different methods of paint cleaning for you to use, and they’re based on how bad your paint is. We’ll start with the easiest, or lightest paint cleaning method.
LEVEL ONE
This is a “maintenance level”. You’ve been following this guide for six months, and you keep your car’s finish in great shape. Your paint, while needing a fresh coat of wax, is otherwise pretty good. Minor roughness, very few specks in the finish, depth and reflection of the finish are still very good. You don’t have any deep swirls, or moderate scratches to repair. This is not going to take you more than a few hours, and is completely done by hand.
First, you’ll need 3M Imperial Hand Glaze (carcareonline). This is glaze that lightly cleans/polishes the paint, while filling in swirl marks. It’s gentle enough to use as often as you like, and widely regarded as one of the finest paint prep cleaners you can use. I buy it in large bottles (A whole gallon? I think so, but I’m not sure) and then use a Meguiar’s squeeze bottle filled with it. I apply this, and all polishes and waxes, with a yellow foam Meguiar’s pad (Also carcareonline..
Put a small amount of the Imperial Hand Glaze (IHG from this point forward) on an applicator pad. Rub into the paint, back and forth motion, one panel or section at a time. Use moderate pressure, but don’t put your body weight into it. Once you’ve thoroughly gone over a panel, you don’t need to let it dry (or want to!. IHG is a real pain to remove if you let it dry, so you must do the car in sections. Take a high quality cotton towel (again, not the cheap Costco ones, never on the paint! that’s clean and has been soaked then wrung out in water, and wipe away the IHG. Back and forth motion, never circular. Using a wet towel makes it much easier. Go over the surface once more with a dry towel, and you should now have a very smooth surface. That’s it – go panel by panel, applying then wet towel then dry towel. Your paint should be very smooth, but it won’t pass the “towel test” without a coat of wax. The “towel test” is this – Stand by your driver’s side mirror, take a clean dry folded towel, toss it onto the center of your hood. If it glides off the hood, you’re in good shape. If friction keeps it on the hood, you did something wrong. This test is based on millions of dollars of scientific research
LEVEL TWO
Even if you’ve been properly detailing your car since it was new, you’ll probably use this level once a year. Here, your paint is pretty rough. Depth and reflection are okay, but it’s rough and there’s noticeable contaminants embedded in the paint. You may have deep swirl marks from the days when you took the car to the car wash, or some mild to moderate scratches (we don’t care about deep scratches, you can’t fix them with detailing). When I bought my Camaro, it had been sitting on the dealer lot for several months and I had to use “level two” the first day I owned the car.
You’re going to need a random orbital buffer. Not a buffer, not an orbital buffer – a RANDOM ORBITAL BUFFER. These change speed and rotational pattern, so you don’t generate excessive heat on one area of the paint. They’re very safe for any amateur to use. Leave the regular buffers to the paint shop pros – I’ve been detailing a long time and I still wouldn’t trust myself with one. It’s easy to burn through the paint with one, and not worth the risk. I have a Porter-Cable, very high quality, adjustable speed, but it’s over $200. They have a lower model that costs around $150 (Griot’s Garage carries both), that should be excellent as well. The cheap Wal-Mart ones probably won’t last very long, but I have to admit that the only buffer I have ever used (or needed) is my Porter-Cable. Trust me, spend the money now because it will last forever.
Get your random orbital buffer. If speed is adjustable, set it at halfway. You’ll need foam pads, Griot’s carries both thin orange ones and thicker white ones. Both are great, get whichever you want. One neat trick is to use a Sharpie and label the side of the pad, and just keep one pad for each different paint cleaner (you’ll need a total of 4 pads if you follow this guide explicitly).
Okay, buffer is plugged in, pad is on. For Level Two, we use 3M Imperial Machine Glaze (IMG). IMG is the stronger, machine-applied brother of Imperial Hand Glaze (IHG). Buy it at the same place as IHG, and again I buy the big jugs and pour it into the Meguiar’s squeeze bottle. I’d label the bottles but IHG is more brown whereas IMG is grey in color. Put a thin layer of IMG on the pad, and spread with your finger. Just enough to color the entire pad. Place the pad on the paint before starting the buffer. Turn it on, and just like the IHG we’re going panel by panel, cleaning it off before it dries. Same technique as IHG, but with a buffer instead of by hand. Side to side, panel by panel, moderate pressure on the buffer. What I do is cover the panel with a horizontal pass, then go back with a vertical pass. If two passes aren’t enough, you need to go to Level Three. Buff, wipe with damp rag, wipe with dry rag. IMG comes off pretty easily. Be sure to keep the buffer’s pad wet with IMG, usually one “coat” on the pad is enough for one panel, or one door. On the roof and the hood, I need one “coat” per half.
Now that the paint is buffed with IMG and you cleaned it off, go back and use the IHG as described in Level One. You’ll have filled those swirls and scratches, restored full depth and luster, and have a very smooth surface. You shouldn’t need this level (or higher) more than once or twice a year. Only Level One is gentle enough to use as often as you want. The IMG is certainly gentle, but like any machine polish it’s not a good idea to use it as your “routine” cleaner. Let’s look at Level Three, the most aggressive and time consuming method.
LEVEL THREE
Here, your paint is crying out for help. Rough, contaminants, finish has lost significant gloss and depth, moderate scratches, maybe even a paint transfer or two (paint from someone else’s car if they bumped you in a parking lot). This is the level that no car wash is going to be able to recover your car from, and no mild hand-applied (IHG) cleaner is going to fix. Here, we’re using the buffer 100% of the time. This is an aggressive method, and should ONLY be used if you absolutely need it. Try Level One and Two first before moving to Level Three. If this level doesn’t work, you need to visit a body shop.
You’ll need your buffer, three pads, and the Griot’s Garage Machine Polish kit. It’s three separate polishes, One, Two, and Three. Three is the most gentle, One is most aggressive. You’ll also need a clay bar, Speed Shine, and plenty of towels (and time!.
Let’s start with the clay bar. This will get much of the junk out of your paint, but clay bars can also remove a very miniscule layer of your clearcoat. Soak the clay (I like the Griot’s Garage clay the best, I’ve also used Meguiar’s and Mother’s clay) in Speed Shine to keep it wet. Spray the surface liberally with Speed Shine, and rub the clay back and forth until you no longer feel friction. Yet again, we’re going panel by panel, drying as we go. Frequently fold the clay over on itself to expose a clean surface. If you don’t, you’ll drag the contaminants you just picked up across your paint. Spray your hand with Speed Shine too, or the clay will stick and you’ll have a tough time washing it all off.
Now, we move on to the most aggressive polish, #1. We’re using the same method as we used with the IMG in Level Two, but we’re skipping the wet towel. Since we’ll be using more polishes, we don’t care about getting the surface completely buffed and haze-free just yet. If you don’t see significant improvement by now, go back and use #1 again.
Move on to #2, using the same techniques (no wet rag is needed). When finished, your paint should look pretty impressive.
Now #3, the finest polish. This is about as aggressive as the IMG. When done, your paint should be in the best possible shape. Since this is the final cleaner, use the wet rag. Use a dry towel and Speed Shine to be sure the paint is completely clean before you wax. If you’re not happy with the results, look into 3M Perfect-It Rubbing Compound. It’s an extremely aggressive cleaner that will remove clearcoat. I don’t use it, I don’t think most people will ever need it, and I’m not going to cover it here.
IV. Wax
You’re almost there, not much more to go! Like the previous section, I have different “levels” for wax, depending on how long you want the protection to last. Wax is going to add a tiny bit of depth to the finish, and make your paint butter-smooth so it passes the “towel test”. Level One consists of a coat or two of Blitz wax , the finest carnauba wax I have found. It goes on easy, buffs off easy, doesn’t stain your trim parts, and provides excellent protection and smoothness. carries it. Level Two adds a synthetic sealant called Klasse High Gloss Sealant Glaze, purchased from properautocare/. It is applied before the Blitz Wax, and acts like a pliable coat for the paint. You’ll see what I mean if you dip your finger in it – it dries and leaves a waterproof film.
LEVEL ONE
You Hand Glaze and wax your car once every month or two, and don’t need long lasting protection. Here, you simply need one or two coats of Blitz Wax. Foam Meguiar’s pad, back and forth, like the polishes. However, coat the entire car with a thin coat, and let it sit for an hour in the shade/garage. Wax has to glaze over, or “bake” onto the paint before you can buff off the excess. Make sure you use thin coats, because only a small amount works its way into the paint – the rest is just waste, and makes buffing the car more difficult. Use high quality USA cotton towels to buff off the wax after about an hour. If you’re only doing one coat, use one dry towel to buff the car and then go back with another clean towel and use Speed Shine to remove any leftover wax and haze (and to get in the door jambs, gas door, any other gaps where wax may have accumulated). On my large Accord sedan, it takes me 45 minutes to go from “covered in caked-on wax” to “completely buffed, haze free and perfect looking”. If you’re doing two coats, skip the Speed Shine and apply the second coat. Another hour later, buff then buff again with a clean towel and the Speed Shine. A second coat will last a little longer, and often add just an extra bit of smoothness to the paint.
LEVEL TWO
Use the Klasse sealant if you’re detailing right before winter, or any other time you plan on going 3 months or longer between detailing jobs. This added step is done BEFORE the Blitz wax, not after. Synthetic sealants need a clean, wax-free surface to bond to. Foam Meguiar’s pad, bottle of Klasse sealant. Very, very thin coats. An ounce is enough to do an entire car. Technique is exactly the same as the Blitz Wax in Level One, but the Klasse sealant is much more difficult to buff off. If you use too much, it will be a REAL pain in the butt, plus it will leave a haze that will last through at least a couple washes. On darker paints, this haze is really an eyesore, so be careful. I use one coat, you can use two if you wish (THIN!!!. Be sure to buff it very well before moving on to the Blitz wax. Also, the Klasse is going to add a whole new depth to the paint, it’s very very nice. Worth the hassle if you cannot settle for anything but the ultimate finish and protection.
Now your paint looks like a million bucks. You’re tired and sweaty, but I bet you can’t stop staring at your car. You’re done with the paint, the interior, and you could go grab some dinner if you want to…but we still have a few things left to do, if you’re looking for the perfect detailing job!
V. The “Little Things”
The little things make a detailing job great, and this is where you can tell who knows their stuff and who doesn’t. The little things easily get passed over by lesser detailers…don’t be a lesser detailer! Here are some areas you may have never thought of spending time on before…
1. Metal Polish – under the hood and stainless steel exhausts
Griot’s Garage sells both a regular metal polish, and scrubber pads that are embedded with the polish. Meguiar’s makes a metal polish paste that comes in a jar. I use the Griot’s scrubber pads to polish my exhaust, and the Meguiar’s paste with a rag under the hood. Metal polish restores shine and luster to your bare metal surfaces. Under the hood, any metal fitting, clamp, etc. is fair game. Just follow the directions, and remember that you don’t need much polish to get the job done. Also, by now I am assuming that your exhaust and engine bay are already clean…don’t use metal polish on dirty metal.
2. Chrome polish, any chrome accents
Lot of cars have at least a little chrome on them. Remove light scratches and restore chrome to its full brilliance with Griot’s Garage Chrome Polish. It works great, and unless you have tons of chrome one little bottle will last years. If you’re working on chrome window trim, be careful to keep the polish off the paint. It’s okay if you get it on the windows, though.
3. Glass polish, Detailer’s Pride Glass Polish with aggressive sponge
The only glass polish you’ll ever need. Apply some to the rough sponge that Proper Auto Care provides you, buff your glass in a circular motion (yes, for once, circular is okay! until the polish hazes and starts to become clear. Clean off with a dry towel. Haze free, removes water spots and other junk you thought was permanent. You don’t ever need to use this on the interior, and never use it on mirrors. Exterior glass only. Sunroof, and your windows. Keep it off the paint. This stuff works miracles, and removes spots that nothing else will. Also, it makes your windows extremely smooth…they’ll pass the “towel test” with flying colors. Water just whisks away, so polish your glass when winter is coming to make driving in rain and snow a little easier. Rain-X makes a glass “wax” that will further prevent water from sticking to your glass, but living in SoCal I’ve never needed to use it (but I have a bottle, go figure).
4. Tire Dressing, THE BEST ON EARTH, Eimann Fabrik Black Opal
I’ve tried almost everything. Griot’s, all the ones at Pep Boys, the Endurance stuff that so many people talk about, everything. Nothing comes remotely close to the deep black gloss and long-lasting shine of Eimann Fabrik . This stuff is a thick liquid that smells great and makes a total mess of your hands (and paint if you get it on there!. Apply with a foam applicator, either a Meguiar’s pad, foam Griot’s pad, or those Eagle One tire applicators. Never use that applicator for anything else, ever again…trust me, the tire dressing gets in there and it’s never coming out. The gloss will last at least two weeks, through rain, it’s still looking great long after any other dressing would have vanished. I know, all the tire dressings claim this…but only Eimann Fabrik delivers. Excellent stuff. Also, it won’t fling off the tires onto your fenders and wheelwells like other dressings.
I hear 303 Aerospace Protectant works well too , but I haven’t tried it yet. Forever Black Tire Gel is a permanent dye for your tires, not a dressing. This also works great for old and faded sidewalls. Again… Proper Auto Care has the Forever Black tire gel kit (with foam applicator included).
5. Restore faded black trim pieces, a true miracle… FOREVER BLACK
Forever Black. Anyone who knows me personally has heard me praise this stuff. From the same people that make the Tire Gel, Forever Black is a permanent dye. In fact, it’s the same black dye that OEM’s use in the factory. It soaks into plastic rubber and metal parts, and it never comes out. It’s not a dressing…you’ll never need a dressing again. It’s a small bottle with a foam applicator tip built in. Griot’s Garage sells essentially the same thing, but under their own label, Bumper and Trim Reconditioner.
DO NOT GET THIS ON THE PAINT. If you need to dye window trim, black plastic door handles, side mirror trim, or anything else next to your paint…mask it off well with several layers of masking tape. All it takes is one hard push on the bottle to make the dye rush out through the foam tip, and drip down onto your paint. At that point, only a machine buffer with Machine Polish will get it off. Hand glaze and clay bars will not touch it.
Anyway, all your black plastic and rubber trim, black metal trim, lots of stuff under the hood (although those parts rarely fade, with no sun exposure) – Forever Black is the answer to faded trim parts. It comes with a cleaning concentrate, which I mixed with the appropriate amount of water in a spray bottle and labeled it. You use this to clean/prep the surface. Once completely dry, start with the Forever Black. Light strokes, thin coats. I’ve had pieces that required nearly 20 coats, so be patient. Go slowly to avoid bubbles. Cover the area perfectly, once it dries the part will look weird if areas weren’t dyed. 10 minutes is enough time to wait in between coats. I think you’ll be very impressed…and again, this is a dye. If your car sits in the sun all day, once a year should be enough. If it’s usually garaged… you may only need to use Forever Black once every 2-3 years. Which is a good thing, because you have to be extremely cautious and it’s a real pain the butt.
On wiper arms and other black metal trim, let the parts completely dry and then use your machine buffer and Machine Polish 3 or Imperial Machine Glaze to restore a great, glossy shine to the part. No wax is needed.
6. Polish and wax your wheels
I put this here instead of in the Polish and Wax sections, because it’s really not necessary. However, every so often you might want to Hand Glaze your wheels when you do the paint. I’ve even used a buffer and Machine Polish 3, but it isn’t really an improvement over Hand Glaze. Some people wax their wheels, but heat from the brakes quickly melts it away. Honestly, I wouldn’t bother with anything more than an occasional Hand Glaze job on your clearcoated wheels. Griot’s Garage Mag Wheel Polish works nicely on polished aluminum or magnesium wheels.
7. Protect your rubber gaskets, door seals, etc.
Either Sonax Rubber Protectant or Zymol Seal Rubber Conditioner will work great. The Sonax comes in a foam-tipped applicator bottle, much like the Forever Black. In SoCal, I don’t have extreme cold temps that will harden and crack my door seals, so I just treat them once a year or so. If you have “real” winters, you might want to use rubber conditioner more often. The Wurth spray on protectant is good, but I don’t like the idea of using a spray on small rubber seals. The overspray will be on the paint, and possibly in your interior. Stick with a gel, or something you can put on a towel and then precisely apply to the seals.
8. Griot’s Garage Clear Plastic Polish
Use Plastic Cleaner and Clear Plastic polish on your headlights and any other clear plastic (gauges, etc). If your headlights are very scratched and sun damaged, I’d use the buffer with Machine Polish #3. 3M Imperial Hand Glaze will make your headlights and taillights nice and smooth, but the Griot’s Plastic Polish will restore them the best. Just follow the directions on the bottle.
AND THERE YOU HAVE IT!
That’s the end of this guide to auto detailing. Have fun detailing your car, and hopefully this guide covered everything you needed to know. You can consider this version 1.0, and sections will be added or modified as needed.
Random thoughts/additions
I know there are other products out there that work just as well, but for the sake of time and length I only mentioned the ones I use. Other people have great success with other products, but this guide is based on my personal experiences as a detailer/enthusiast so I didn’t really include the experiences/opinions of others.
On waxes Paste only. Liquid waxes are easy, but they don’t form a strong bond with the paint. No wax is “100% Carnauba”, no matter what the container says. Natural carnauba is very hard, and needs lots of other ingredients to be soft enough to make an automotive paste wax. Actually, no wax is going to be more than 30% carnauba. Griot’s, Zymol, Meguiar’s and others make very nice carnauba waxes. However, Blitz protects at least as well as any of these, plus it’s one of the few waxes that will not stain your trim parts. This is a huge deciding factor in choosing a wax, as you’re bound to get some on rubber and plastic trim. Lots of people think you have to detail all your trim pieces after waxing…but with Blitz, you don’t have to. Never, ever use a buffer to apply or buff off wax. Wax is something that should always be 100% done by hand.
Hard water, soft water, deionized water – I wash my car with soft water. Until the damn thing broke and was returned, I had an AmeriWater deionizing unit inline with my car washing hose. Honestly, deionized water is no big deal. People always say “with deionized water, you can just rinse and walk away, the sun will dry it and there are no water spots, this is how car dealerships wash cars”. Well, that’s not true. Deionized water reduces mineral content, and yes water spots are less frequent…but you still get them, you still have to dry the car yourself. The units are expensive, and I don’t think it’s worth it. Soft water is nice, but hard water is fine too.
When rotating your tires, scrub the suspension components and the brakes with the same Simple Green/water solution you use on the wheels and tires. It’s the perfect opportunity to get back there and scrub behind the wheels. If you wash your car properly, those parts shouldn’t be very dirty when you remove the wheels.
Car scents suck. The vapors will stick to your interior parts and leave behind a film. Besides, cars aren’t supposed to smell like that. Keep your interior clean and detailed as I described above, and it will always smell clean. If you have leather seats and you must get drive-through food, keep the food on the seat and not on the floor. It’s easier to clean spills off leather than out of carpet. Same goes for large bottles of soda that don’t fit in your cupholders.
When you go to Jiffy Lube, or your dealer’s service department, or anywhere else they offer to clean or wash your car in any way…always decline. One wash from the service department will undo your hard work. If you’re away from home and can only access a car wash…leave the car dirty. I’m not going to rant about the 20 ways a car wash will ruin your finish, but please avoid them altogether. Even “touchless” washes use recycled water, crappy products, and cheap towels that they use in a circular motion. Not to mention the guy washing your car probably has a damn keychain and belt buckle just waiting to drag across your paint when they reach for the roof or hood. Just last week, when shopping for my new Honda, I watched a car salesman lean over to get the VIN number off a brand new Accord he was trying to sell me, and drag his keys across the fender. A deep clearcoat scratch on a brand new car, and they wanted me to buy it? No thanks! Dealers have no concept of paint care.
That’s the end. Thanks for reading, Hope my guide helps you out, and have fun!"
having a clean shiny car that smells nice can go a long ways for making up for it not being a porsche
|


 [/img]